
Last updated: November 14, 2026
A sagging soffit or a split fascia board means one thing: get the soffit and fascia repair tools and materials in hand before you climb the ladder. Quick answer: most repairs start with 7 core items — a ladder, pry bar, saw, drill/driver, caulk gun, primer, and matching replacement boards or panels. This guide lays out what you need for soffit and fascia repair, in the order you will actually use it.
Key Takeaways
- Start with access gear and safety gear before you buy any trim material.
- Cutting tools, fasteners, sealants, and paint supplies each solve a different part of the job.
- The wrong fastener or sealant can undo the repair fast.
- When the wood is soft, the rot is larger than a small patch, or you cannot reach safely, stop and bring in help.
What tools and materials do you need for soffit and fascia repair?
A ladder, pry bar, circular saw, drill or driver, measuring tape, caulk gun, and basic safety gear are the core tools; add replacement soffit, fascia, fasteners, primer, caulk, and paint. That starter kit fits a common repair. It is not a full remodel.
Because the work is small but the stakes are not, it helps to sort the soffit and fascia repair tools and materials by task. First remove. Then cut, fasten, seal, and finish. That sequence keeps you from hauling home random items that sit unused once you are on the ladder.
Picture the edge of the roofline, with one loose fascia board ready to come off without cracking the next piece. The job goes smoother when everything is grouped by task. In practice, a neat tool list matters more than a long one.
- Access and removal tools get the old material off cleanly.
- Cutting tools shape the new board or panel to size.
- Fastening tools hold the repair tight against the framing.
- Sealants and coatings close gaps and protect the edges.
That sequence also helps you catch what is missing before you start. It keeps the shopping list from drifting.
A basic list usually includes:
- Extension ladder with stabilizer if the roof edge is awkward
- Pry bar or cat’s paw
- Hammer
- Circular saw
- Jigsaw or hand saw for trim cuts
- Drill/driver
- Measuring tape and pencil
- Caulk gun
- Utility knife
- Gloves, eye protection, and a dust mask
- Replacement soffit panels or fascia boards
- Exterior screws or nails
- Construction adhesive where appropriate
- Exterior caulk
- Primer and exterior paint
Honestly, you do not need every tool above for every repair. A short soffit swap may need only a pry bar, drill, and caulk gun. A rotten fascia section often needs the saw, the driver, and paint supplies too. So the soffit and fascia repair tools and materials should match the damage, not the aisle display.
For a broader repair roadmap, the hub on soffit fascia repair methods covers the job sequence this checklist supports.
Which cutting tools are worth having?
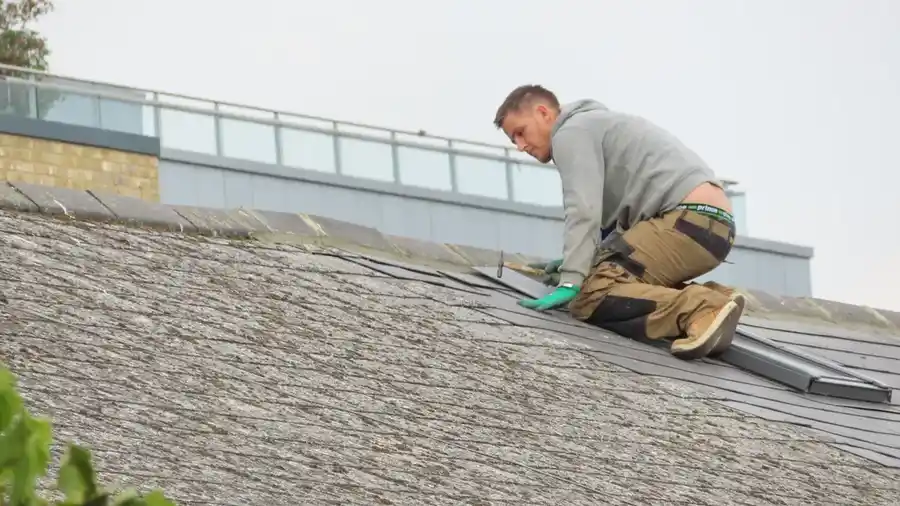
A circular saw handles the big cuts, while a hand saw or jigsaw takes care of the smaller trims that need more control. Straight fascia boards and long soffit strips need a clean edge if they are going to sit flat without being forced into place.
The cut list is where many first-time repairs go sideways. A board that is off by 1/8 inch can leave a seam that catches water or looks crooked from the driveway. So the cutting tools in your soffit and fascia repair tools and materials kit are not optional extras.
Picture yourself measuring twice and cutting once, because a sloppy edge will leave a visible gap at the corner. The saw marks show up fast. Roofing trim is unforgiving that way.
Use the saw that matches the material:
- Circular saw for straight rip cuts in wood or trim boards
- Miter saw for square, repeatable end cuts on trim
- Jigsaw for vents, curves, or tight notches
- Utility knife for scoring vinyl or thin material before snapping
Measure vent openings before you cut any vented soffit. A panel that is too small leaves framing exposed; one that is too large can rattle or buckle. For fascia, cut the replacement board to the exact span of the damaged section, then check the ends against the corner trim before you fasten anything.
A clean cut matters more than a perfect paint job at this stage. Ragged edges widen the caulk line, and that usually makes the repair look weaker. According to the U.S. Department of Energy, attic and roof ventilation details need to stay unobstructed, so accurate cuts matter at the vent openings too. See roof maintenance for related upkeep.
Two practical rules help here:
- Keep a spare blade on hand for the circular saw.
- Cut outdoors or in a well-ventilated area so dust does not build up around the work zone.
What fastening hardware should you buy?
Exterior-rated fasteners that match the material and framing are the right call, usually galvanized or stainless screws or nails. The wrong choice can stain the trim, back out over time, or fail early when moisture reaches the roof edge.
That matters most on a fascia repair, where wind, rain, and temperature swings hammer the board all year. Hardware belongs on the soffit and fascia repair tools and materials list because the repair is only as strong as the fastener holding it.
Picture a new fascia board that looks tight on day one, then starts to lift after a few wet weeks. Usually, the board is not the problem; the fastener choice is. Roof edges take a beating.
For most repairs, stock these items:
- Galvanized or stainless screws for secure attachment; if you are unsure which fastener fits your trim or framing, consult the trim manufacturer or a qualified pro before you buy
- Exterior finish nails where a nail set and trim look matter
- Washers if the material is thin or brittle
- Construction adhesive for specific trim applications, not as a replacement for proper fastening
Match the hardware to the substrate. Wood framing takes screws or nails that bite cleanly. Vinyl or fiber-cement trim may need a different fastener pattern and spacing. If you are not sure, check the manufacturer’s instructions for the replacement material. That beats guessing, every time.
A common mistake is using interior fasteners because they are already in the toolbox. They rust. Rust stains are hard to hide under paint, and they can weaken the repair. Another mistake is overdriving screws until the trim bows. Then a gap opens at the edge and the board can crack.
If the old board was held with nails and the new board is heavier, upgrade to screws where the product allows it. A strong hold is worth the extra minute. For more exterior fastening context, see exterior trim repair.
Do you need caulk, primer, and paint?
Yes — caulk, primer, and exterior paint are needed if the repair is supposed to last and blend with the rest of the house. These finishing materials do different jobs, and none of them replaces the others.
Once the board is on, seal and finish it before you call the job done. The visible part matters, but the hidden edge protection matters more. That is why caulk, primer, and paint belong in the same soffit and fascia repair tools and materials plan.
Picture the board installed, the repair technically finished, and the seams still showing daylight. That is the point where sealant and coating work begin.
Use these finishing materials:
- Exterior caulk for small gaps at seams, joints, and edges
- Primer on raw wood or bare repair areas before paint
- Exterior paint that matches the existing finish and stands up to weather
- Putty or filler for small surface dents in wood trim, if the product allows it
The sealant should be made for outside use. Interior caulk dries wrong for this job and often fails near rain exposure. Paintable caulk is the better choice where the joint will be coated later. Apply it in a thin bead, not a thick rope. A thick bead can shrink, crack, or look uneven after it cures, so if the gap is wide or moving, consult a professional and follow the sealant manufacturer’s instructions.
Primer is not optional on bare wood. Without it, the wood drinks in the paint unevenly, and the patched section stands out. A single coat of primer usually gives the topcoat something to grab. Then the paint can blend the patch into the rest of the fascia or soffit.
One more point: caulk is for narrow gaps, not for rebuilding rotten wood. If the board feels soft or crumbly, stop there. Sealer hides a problem; it does not fix it. See exterior painting for finish-matching tips.
What safety gear should be on the list?
Gloves, eye protection, a dust mask, and stable footwear should all be there, along with a ladder setup that keeps you planted and centered. These are not extras. They belong in the repair kit because soffit and fascia work happens above shoulder height.
The ladder matters just as much as the gear. OSHA says the top three rungs of an extension ladder should not be used as a step, and the ladder should be set at a safe angle. When the ground is soft or the roof edge is too high for stable work, stop before you start. That is why safety gear belongs with the rest of your soffit and fascia repair tools and materials.
Picture being on an extension ladder with one hand on the rail and the other holding a pry bar. That is a bad moment to find out your shoes are slick or your gloves are too bulky to grip the fastener. The right gear keeps small mistakes from turning into falls or cuts.
Keep this on hand:
- Work gloves for sharp edges, splinters, and old nails
- Safety glasses for prying, drilling, and cutting
- Dust mask when sanding, scraping, or cutting dusty material
- Non-slip footwear with firm soles
- Ladder stabilizer if the roof edge needs more support
Avoid loose sleeves, dangling cords, and anything that can catch on trim nails. Keep the area below the work zone clear so dropped hardware does not become a hazard. A bucket on a rope can help move small tools up and down without climbing with both hands full. For ladder setup details, see ladder safety.
What should you buy first if the damage is small?
Buy the access gear, pry tool, fasteners, and caulk first, then add replacement boards only after you know the size and material you need. That keeps you from buying the wrong trim before you have measured the opening.
Start small, then scale up. The first purchases in a soffit and fascia repair tools and materials list should let you inspect, expose, and measure the damage before you spend on finish parts.
Picture standing in the store, staring at rows of boards, panels, sealants, and screws, with every aisle looking possible. Begin with the smallest kit that lets you inspect and expose the damage. Once the old section is open, the real size and shape are easier to read.
Use this purchase order:
- Ladder and safety gear so you can inspect safely.
- Pry bar, hammer, and drill/driver so you can remove the damaged piece.
- Tape measure and pencil so you can record the exact span and depth.
- Replacement soffit or fascia that matches the existing material and profile.
- Fasteners, caulk, primer, and paint to finish the repair.
That order keeps waste down. It also helps you avoid a common mistake: buying finish materials before you know whether the framing underneath is sound. If the wood behind the board is rotten, the material list changes.
This is also where a lot of people overbuy. A full truckload of supplies looks prepared, but it can hide the real problem. A focused list is better than a crowded garage shelf. If you need a comparison point, use roof maintenance and exterior trim repair to match the job to the materials.
When should you stop and get help?
Stop when the wood behind the fascia is soft, the soffit area is too high or awkward to reach safely, or the damage stretches beyond a single board or panel. That is the line where tools and materials stop being the main issue and safety or hidden damage takes over.
Once the repair crosses that line, more soffit and fascia repair tools and materials will not solve it. The source of the damage has to be addressed first.
Picture prying off a section and finding crumbly wood behind it. That is no longer a cosmetic fix. A simple material list will not solve rotten framing, insect damage, or a roof edge that flexes when you press on it.
Signs you should pause:
- Rotten or spongy wood behind the trim
- Large gaps where water has entered repeatedly
- Sagging sections that suggest hidden structural damage
- Electrical, gutter, or roof-edge complications near the work area
- Any ladder setup that feels unstable
A simple trim repair uses a simple kit. Once the damage is bigger than the surface board, the next step is not just buying more caulk or a longer board. It is finding the source of the damage and deciding whether the repair is still a reasonable DIY job.
If you are only gathering materials, use the list above as a filter. If you are already partway into the work and the hidden damage is worse than expected, stop before you pile more money into the wrong fix. That saves time, and it keeps a small repair from turning into a larger one. For a related overview, see soffit fascia repair methods.
Which tools are essential?
The essential tools are a ladder, pry bar, drill or driver, measuring tape, cutting tool, caulk gun, and basic safety gear. Those items let you inspect, remove, cut, fasten, and seal the repair.
A circular saw is the most useful cutting tool for straight boards, while a hand saw or jigsaw helps with smaller cuts. If you can only buy a few things first, start with access and removal tools before you spend money on finish materials. The first buys should support the rest of the soffit and fascia repair tools and materials list.
Do i need specialty fasteners?
Not always, but you do need exterior-rated fasteners that suit the trim material and the framing. Galvanized or stainless screws and nails are the usual starting point for outside work.
Specialty fasteners matter more with vinyl, fiber-cement, or other manufacturer-specific products. If the replacement material comes with its own fastening instructions, follow those instead of using whatever is in the bin. If the instructions are unclear, ask the supplier or a professional before you install them.
What safety gear should i use?
At minimum, use gloves, safety glasses, a dust mask, and stable footwear, plus a ladder setup that stays steady. Those items protect you from cuts, dust, slips, and dropped hardware.
When the work involves sanding, scraping, or cutting old paint or dusty trim, a mask becomes even more useful. And if the ladder feels wobbly or the reach is awkward, stop and reset before continuing.
Drafted with AI; not yet reviewed by a person.


[…] a broader look at the repair side of the topic, the hub article on soffit fascia repair methods fits under this decision point and covers the smaller fixes that still make […]
[…] Soffit and Fascia Repair Tools and Materials […]