
To replace a short section of fascia, cut out the damaged board so both new cut ends land on solid rafter tails, not in the open space between them — in practice, that means the patch spans at least 2 rafter tails. Match the board’s nominal size (a 1×6 is actually 3/4″ x 5-1/2″), nail into solid backing, and stop if rot has spread past where you can cut.
Key takeaways
- Both cut ends of a fascia patch must land on a rafter tail, not between two of them — this means the patch spans at least 2 rafter tails.
- Nominal lumber sizes aren’t actual sizes: a 1×6 is really 3/4″ x 5-1/2″, and a 1×8 is really 3/4″ x 7-1/4″. Measure your existing board before buying replacement stock.
- Fasten with galvanized or stainless 8d or 10d nails, roughly every 16 inches, aligned into the rafter tails behind the board.
- If rot has spread past where you planned to cut, or the problem reaches the framing, stop and call a licensed contractor instead of extending the patch.
- This is ladder work. Standard ladder-safety rules apply, and anything above a single story is a job for a professional.
Why does the cut location matter so much?
A fascia board isn’t just decorative trim — it’s fastened to, and partly supported by, the ends of the roof’s rafters (called rafter tails). When you cut out a damaged section, each new cut end needs something solid behind it to nail into. If a cut lands in the gap between two rafter tails, that edge of the patch has no backing, which means the nails there have nothing to grip and the joint will work loose, flex, and eventually fail — exactly the kind of repair that looks fine on installation day and comes apart within a season or two.
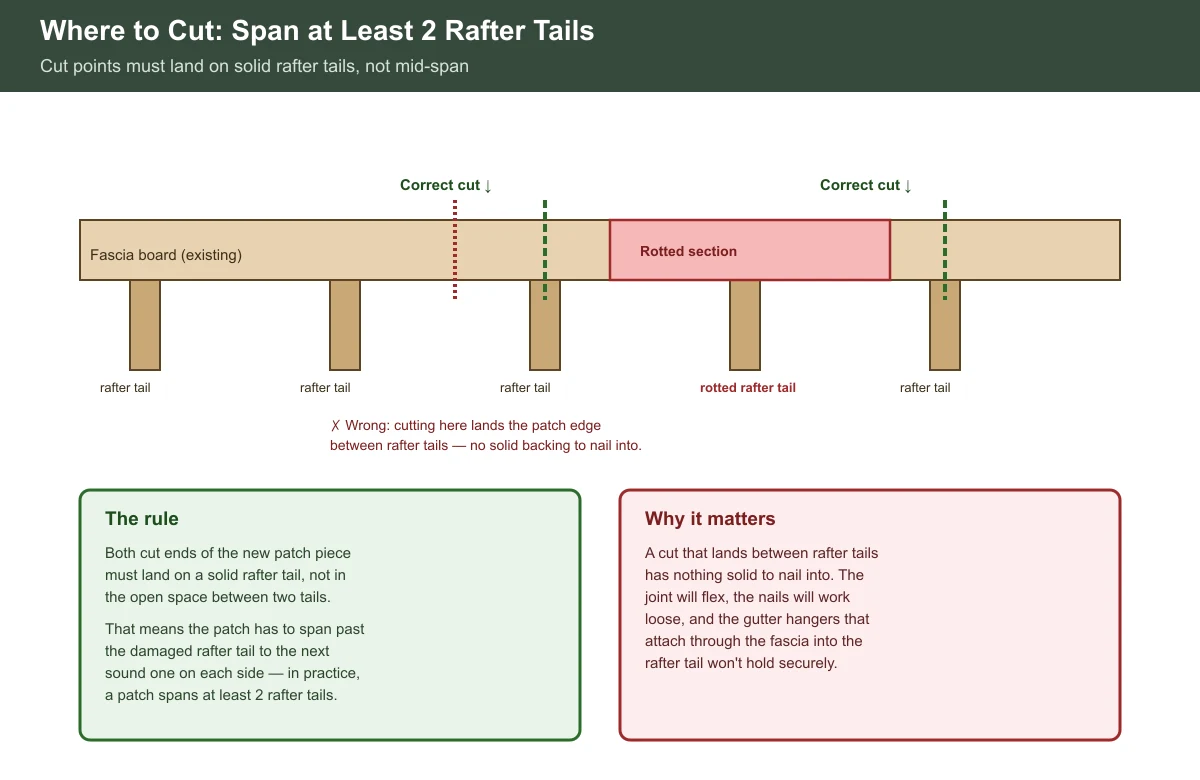
Where exactly should you make the cuts?
The rule, confirmed by roofing manufacturer installation guidance, is that a fascia splice or cut point has to land on a rafter tail so both ends of the new piece have solid backing. Working backward from that rule: if the damaged section covers one rafter tail, the patch needs to start at the next sound rafter tail before it and end at the next sound one after it. In practice, that means a typical patch spans at least 2 rafter tails — the damaged one plus at least one additional tail of solid backing beyond it on each side, depending on exactly how the rot or damage lines up with the framing.
Before cutting, locate the rafter tails from outside: look for the nail pattern on the existing fascia (nails are usually driven where the board meets a rafter tail), or check the attic/soffit side if accessible. Mark each rafter tail location on the face of the board in pencil before you cut, so you’re not guessing with a saw in hand.
What size lumber do you need?
Fascia boards are sold in nominal sizes that don’t match their actual dimensions — this trips up a lot of first-time DIY measurements. A nominal 1×6 board is actually 3/4 inch by 5-1/2 inches, and a nominal 1×8 is actually 3/4 inch by 7-1/4 inches. Span and sizing calculations, including the ones lumber associations publish, use the actual dimensions, not the nominal ones, so measure your existing fascia board directly rather than assuming “1×6” means a true 6-inch-wide board.
| Nominal size | Actual size |
|---|---|
| 1×6 | 3/4″ x 5-1/2″ |
| 1×8 | 3/4″ x 7-1/4″ |
Match the new board’s actual thickness and width to what’s already installed, and match the depth to what the rafter tails were cut to accept — a replacement piece that’s the wrong actual size won’t sit flush with the rest of the run even if the nominal label matches.
How do you fasten the new section?
Use galvanized or stainless steel 8d or 10d nails (the corrosion resistance matters, since fascia sits in a wet, weather-exposed spot), spaced roughly every 16 inches and aligned to land in the rafter tails behind the board, not just anywhere along its length. This spacing is a widely used trade practice drawn from manufacturer installation guidance rather than a single code-mandated figure, so treat it as a solid rule of thumb rather than an exact legal requirement. If you’re also reattaching a gutter section to the new board, make sure the gutter hangers reach through the fascia into solid rafter-tail backing too — a new fascia board with a gutter fastened into thin material between rafters will have the same loose-gutter problem the old board may have had.
When should you NOT patch a short section?
A short-section patch only works when the damage is actually contained. Skip the patch and call a licensed contractor instead if any of these apply:
- Rot has spread past where you’d need to cut to reach solid wood on both sides — if you can’t find two sound rafter tails bracketing the damage within a reasonable board length, the problem is bigger than a short patch.
- The rafter tails themselves are rotted or damaged, not just the fascia board — that’s a structural framing repair, not a trim replacement.
- More than a short run (a few feet) needs replacing, which usually points to a wider moisture or ventilation issue worth diagnosing first — see signs of soffit and fascia rot or damage.
- The work requires access above a single story.
A real-world example of this confusion shows up in homeowner forum discussions, such as a DIYnot.com thread where a homeowner asked specifically about patching only part of a fascia run rather than replacing the whole length — the same question this guide answers, and a sign that “how much do I actually need to cut out” is a genuinely common point of confusion, not just a theoretical rule.
Ladder safety for fascia repair
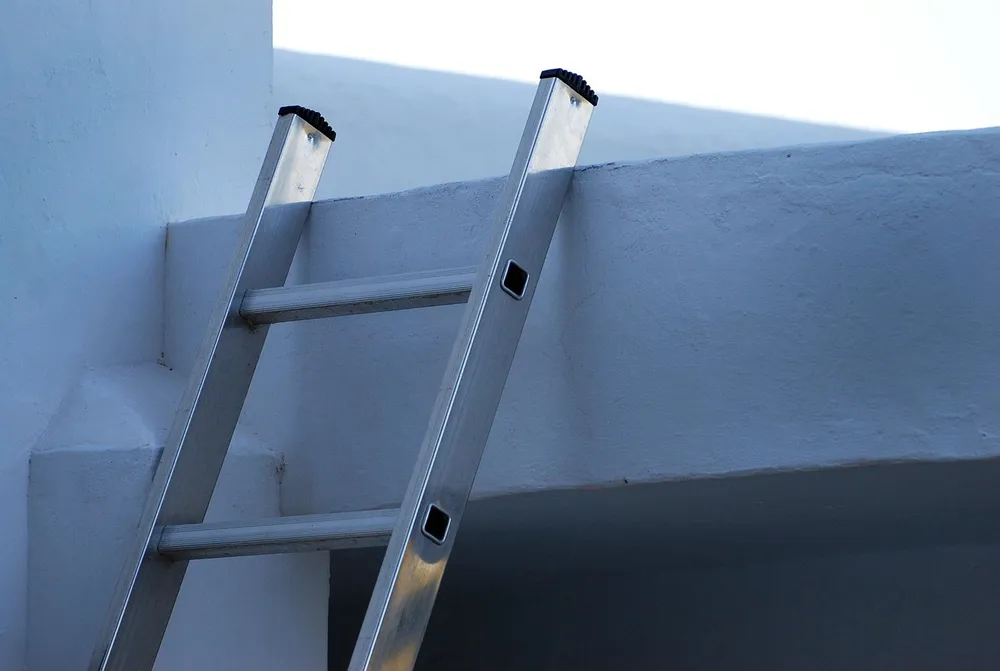
Set the ladder’s base out 1 foot for every 4 feet of height (roughly a 75° angle), and let the top extend at least 3 feet above the roofline or landing point for a handhold. Keep three points of contact at all times, stay off the top three rungs, use a spotter if you can, and set up on solid, level ground in non-slip shoes. Never use a metal ladder near power lines. If the fascia is above a single story, or the rot has reached the rafter tails, call a licensed contractor instead.
Frequently asked questions
Can I patch a fascia board without removing the gutter?
Sometimes, if the damaged section is short and the gutter hangers nearby aren’t in the way, but in most cases it’s easier and more reliable to detach the gutter section over the work area first, then refasten it once the new board is in. Trying to cut and fasten around an attached gutter section increases the chance of damaging the gutter or missing the rafter-tail fastening point.
What if I can’t find exactly matching replacement lumber?
Measure the actual (not nominal) dimensions of your existing board and buy standard dimensional lumber cut to match, then prime and paint all sides before installing, including the back and ends, since unfinished wood left exposed is where the next round of rot typically starts. An exact factory profile match matters more for vinyl or aluminum trim than for painted wood fascia, which is easier to blend.
Is 16 inches the only acceptable nail spacing?
No single code citation mandates an exact number; roughly 16 inches, aligned to rafter tails, is a widely used trade practice from manufacturer installation guidance. The important part is that fasteners land in solid rafter-tail backing, not the exact inch spacing between them.
How do I know if the rot has reached the rafter tails?
Use the screwdriver probe test on the rafter tail itself, not just the fascia board: press a screwdriver tip into the end-grain of the rafter tail where it would be exposed by removing the damaged fascia. Firm resistance means the framing is sound; sinking in easily or crumbling means the rot has gone past the trim board and into structural framing, which is a job for a licensed contractor.
Sources
- IKO, Roof Fascia Repair & Replacement — the rule that fascia cut or splice points must land on a rafter tail so both ends have solid backing. Checked November 13, 2026.
- Berger Building Products, Fascia & Soffit Installation Guide — manufacturer fastener guidance (galvanized/stainless nails, spacing aligned to rafter tails). Checked November 13, 2026.
- USDA Forest Service, Forest Products Laboratory, Wood Handbook: Wood as an Engineering Material (FPL-GTR-282, 2021), Table 6–6 — nominal-vs-actual dimensions for dry dimension lumber (1×6 = 3/4″ x 5-1/2″; 1×8 = 3/4″ x 7-1/4″), based on the American Softwood Lumber Standard PS 20. Checked November 13, 2026.
- DIYnot.com forum, Fascia Board Replacement — cited only as evidence that homeowners commonly ask this exact question, not as a factual source. Checked November 13, 2026.
If you’re not sure whether what’s damaged is the fascia or the soffit above it, start with our soffit vs. fascia guide. If the damage is widespread rather than a short section, read signs of soffit and fascia rot or damage first, and if the real issue is a gutter pulling away from a weakened board, see gutter pulling away from the house.
soffitfasciafix.com Editorial Team. Last updated: November 13, 2026.

[…] to repair fascia board around a corner usually starts with one bad miter joint, a loose edge, or a soft spot where water […]